ColdPAN v1

B A C K G R O U N D
Why did I decide to design a 3D printable medium format panoramic camera? Well, simply because I wanted a reason to buy a 3D printer. Okay, okay that isn’t the only reason. I also wanted to have a camera that could capture stunning panoramic imagery like the Hasselblad XPan, a camera that not only is out of production and hard to find parts for, but is also extremely expensive (for my budget at least). Thus introducing the ColdPAN (cold because it uses no electricity).
The plan was for the camera to shoot 6x17 but because of the limits of my 3D printer bed, I could only do 6x16 and even that is cutting it really close.
Now, let me start off by saying that at the beginning of this project I had never used a CAD program, design anything functional before or personally 3D printed any of my own designs. Surprise, there is a lot more to making your own camera than you would think, or at least I thought.
R E S E A R C H
The first thing I did was look for a lens that would work for my camera. I knew that it required an internal leaf shutter since I wanted the camera made from as few parts as possible. This means the lens itself would have to take care of the Aperture, Shutter Speed, Shutter and Shutter cocking/release. Which meant that I had to use large format lenses or a medium format lens like the Mamiya Press lenses.
After some initial research I found that the Mamiya Press lenses would just not work for the medium format application I was going for. So that began the search for which large format lenses would be viable for my build.

FLANGE FOCAL DISTANCE REPRESENTATION
There are a couple of numbers that you need to know when looking for a lens that will be suitable for your build. The Flange Focal Distance (FFD), Image Circle (IC) and the size of your negative.
The FFD, also known as the Flange-to-film distance, is the distance from the mounting flange to the film plane. This is also the distance the lens needs to be from the film to be able to focus down to infinity. Being a fixed lens with no focusing adjustments available, this is very important.
The Image Circle is also very important. It is directly connected to the FFD distance. For example, if you look at a lens spec sheet it says that the FFD is 80 and the IC is 200 that means at 80mm away from the film plane the image circle will be 200mm in diameter.
Lastly would be your negative size. Since I am building a 6x16 pano camera, my negative size would be 60mm x 160mm.
Now you can see why I started with the lens and worked backward to build the body. The lens you pick will determine the dimensions of the camera lens cone itself. If you want something more compact you need to find a lens with a shorter FFD that still has the IC wide enough to overlap your negative. I am also only looking at lenses with a Copal #0 mount. That just means the hole the lens connects to is small. The larger the Copal # the larger the hole and overall lens size. Another thing to remember is that the closer your negative’s edges are to the edge of the lens’s IC the more vignetting and distortion you will see.
This was my list of possible Copal #0 candidates:
Super-Angulon XL 72mm F5.6 | FFD 82.2 | IC 226
Super-Angulon MC 75mm F5.6 | FFD 84.8 | IC 198
Super-Angulon MC 90mm F8 | FFD 98.8 | IC 216
Nikkor SW 75mm F4.5 | FFD 81.3 | IC 200
Nikkor SW 90mm F4.5 | FFD 97.4 | IC 235
Nikkor SW 90mm F8 | FFD 97 | IC 235
Grandagon N 75mm F4.5 | FFD 82 | IC 195
Grandagon N 75mm F6.8 | FFD 79 | IC 187
Grandagon N 90mm F6.8 | FFD 94 | IC 221
Fujinon SWD 75mm F5.6 | FFD 85.1 | IC 196
Fujinon SW 90mm F8 | FFD 99.2 | IC 216

SUPER-ANGULON 90MM F/8 IMAGE CIRCLE COMPARED TO NEGATIVE
The obvious choice would have been to go with the Nikon SW 75mm F4.5. This had the shortest FFD that would still comfortably cover my film negative. The only problem for myself was its price. As of 2019 it was anywhere from $350 - $450 on ebay, oh and it would ship all the way from Japan (I’m USA based) so the shipping would also add to that number.
Instead I decided on the Schneider Super-Angulon MC 90mm F8. It has an FFD that is 17.5mm longer than the Nikon but it provides 16mm of extra image coverage… oh yeah, and it can be had for $150 with free US shipping. My decision was made.
D E S I G N
What to do first? Start sketching, obviously. At the start I tried to get a sense of what the camera form could be without worrying about actual dimensions. Below are some sketches that I did which are no where near the actual dimensions of the camera. I then tried to think of how parts of the camera could be combined so that: (1) the camera would have as few parts as possible and (2) the parts could be 3D printed without sloppy bridging or the need to excessive supports. A lot of the inspiration for the design of my camera was pulled from a number of panoramic medium format cameras that I couldn’t afford including but not limited to: Fotoman 617, DAYI 6x17, Fuji GX617 and the Gaoersi 617. Aside from those I also stole some inspiration from the likes of Dora Goodman and Ethan Moses’ 3D printed cameras.


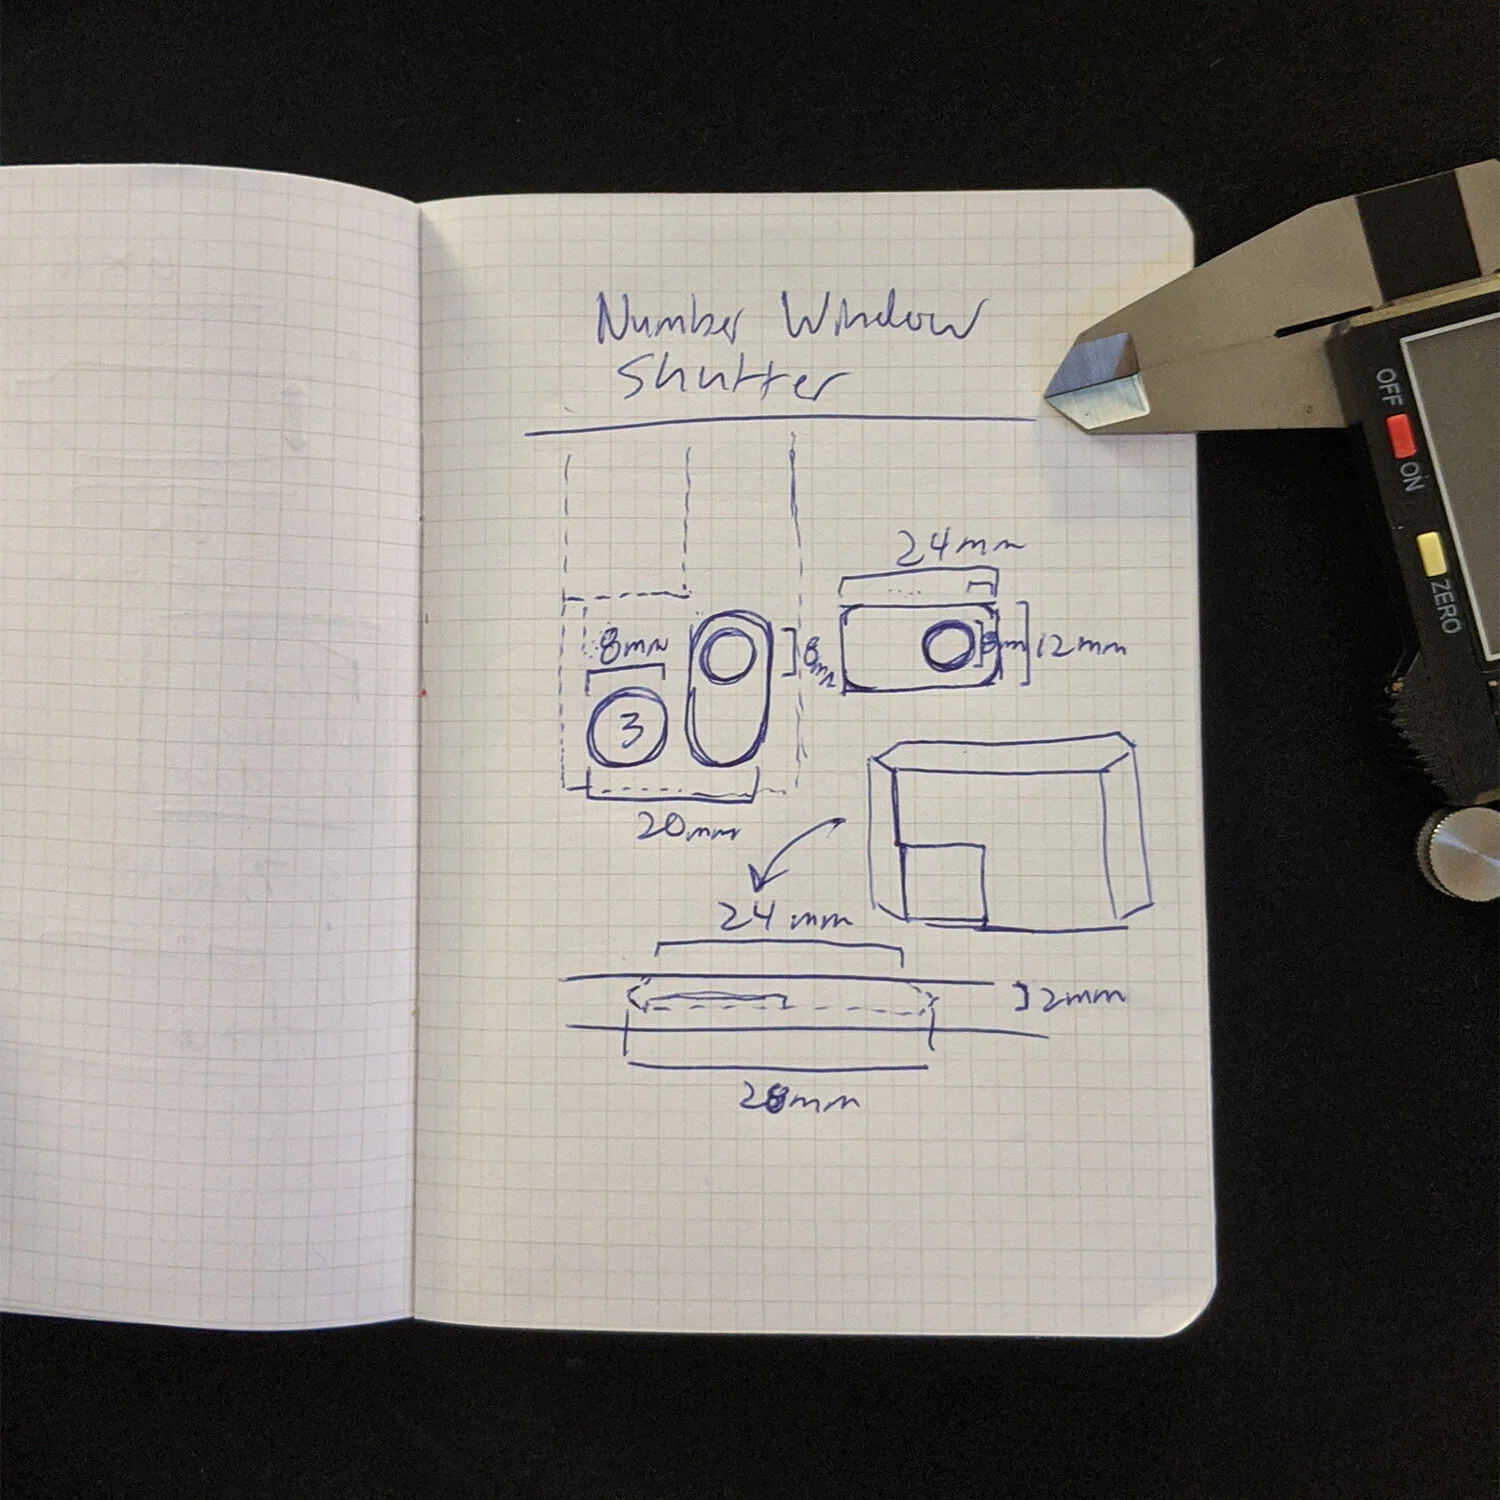
These are not all of my sketches but rather ones I was leaning toward. You will see from the image above of the advancing knob how I list ideas. I do pro and con lists with drawings. In the advance knob sketch adding a spring would allow for a back loading system like traditional SLR cameras but the con would be that it has additional parts and it would add height to the camera body. A body that would already be fairly large. This is why I opted for the removable top plate version where the advance knobs are attached to the top plate reducing the overall height of the body by ~10mm.
Once I settled on the general design, I started the next big task. Learning a CAD program.
You may be asking, “Ryan, don’t you already know 3D?” and the answer would be yes, but CAD modeling and Cinema4D modeling are wildly different animals. For instance, C4D is polygon based while CAD is “sketch” based.
I chose to use/learn Autodesk Fusion 360 and here are some of the screenshots of what I came up with. It took about 3 weeks to learn the basics of Fusion 360 and build out this model.


3 D P R I N T I N G
Oh, look at that! Another thing I know nothing about. Welp, time to start googling. I pre-ordered the Prusa Mini which won’t be here until April, but in the mean time, that gives me the ability to fully learn the slicing software that I will be using to prepare files for 3D printing. Below are initial Slices of the camera body showing infill and support needs.


N E X T S T E P S
The obvious next step would be to print the thing, assemble it and run a test roll, but seeing as I don’t have my printer yet I will just continue to refine and think of new camera layouts. I may revisit some sketches that I discarded and see how they could be improved as they all had something that I liked nestled in them.
I am also going to look into how I want to finish the final model once its printed. As of now, I think I will sand it smooth, spray it with Filler Primer, wet sand it and finally paint it.
Only time will tell.